How To Create An Issue In Jira
The emergence of online collaboration tools has fundamentally changed how we operate in the workplace. No matter your field of work, chances are you are using at least one of these tools.
If Jira is your tool of choice (or you are considering trying Jira out), you need to understand its use of issues to effectively navigate and make the most of the platform.
Before you can do anything with issues, you have to be able to create them. To help you do so, we have put together everything you need to know about creating issues in Jira.
What Is An Issue?
Issues in Jira are commonly referred to as the building blocks of a project. An issue is essentially a piece of work that needs to be completed.
The nature of the issue depends on the piece of work it represents. Therefore, it can be anything from a project task to a software bug, story, or leave request form.
This issue will travel through the project’s workflow until it is completed. Once your team completes all the issues in a project, the project itself will be complete.
How To Create An Issue In Jira
Given the central role of issues in Jira, it is essential to understand how to create and manage issues to navigate Jira.
Step 1: Click On The “+” Icon In Your Navigation Bar
There are many paths you take to create an issue in Jira. The easiest and most commonly-used one is to start by clicking the Create button.
You will find the Create button in the navigation bar on the left side of the screen. It is represented by a + icon and is usually at the bottom of the navigation bar.
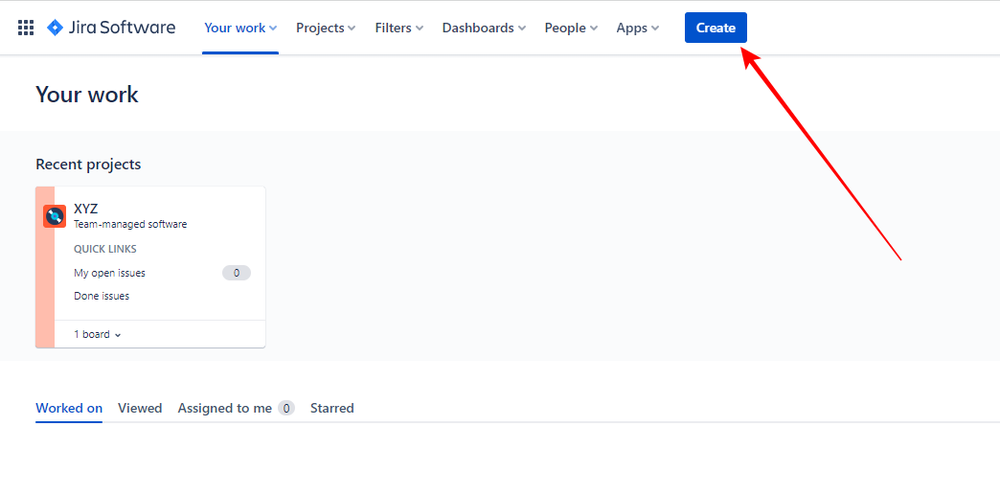
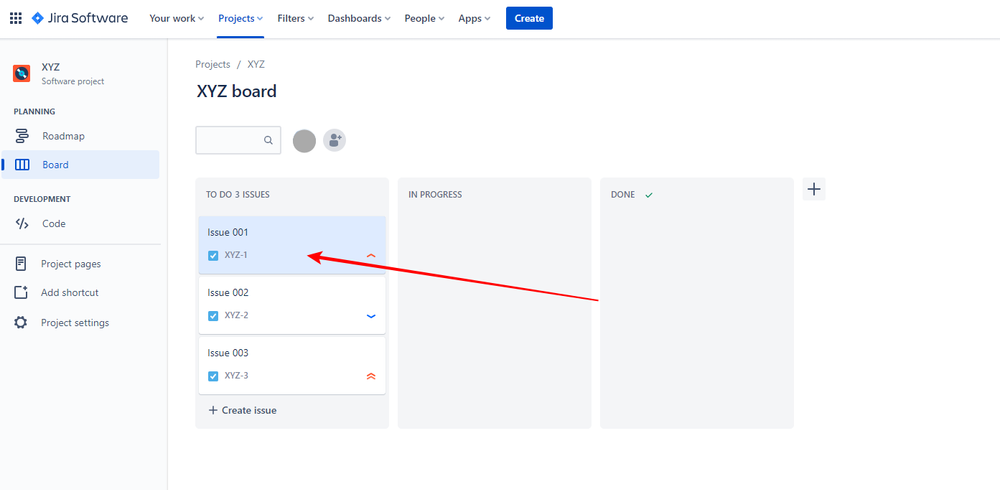
Alternatively, you can click on “Create issue” in the TO DO column when you’re in a project board.

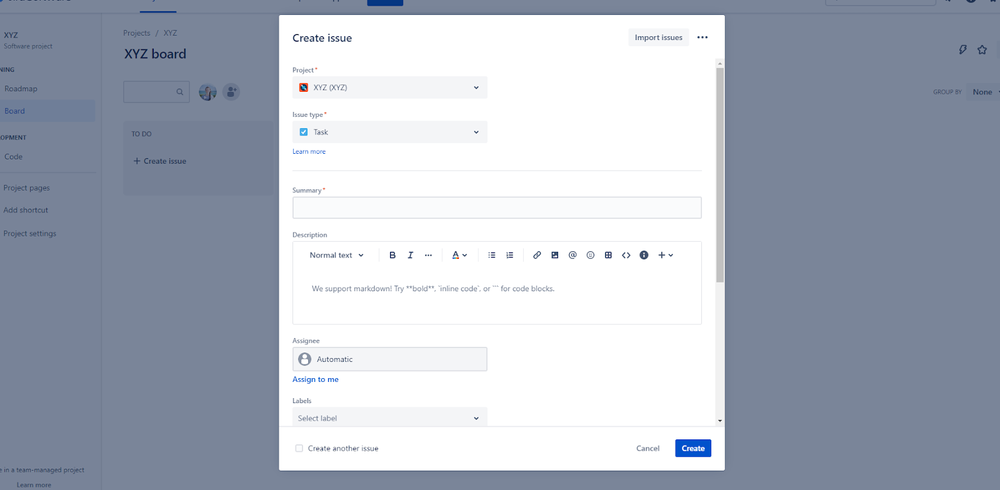
Step 2: Fill In All Required Fields (And Any Optional Fields You Choose To)
Once you have clicked the Create button, you will see various fields to fill out. Note that only the fields marked with an asterisk (*) are required.
The first of these is the Project. Select the project under which the issue falls.
The second required field is the Issue Type. Here, you need to specify what type of issue you have. There are six different options: a Task, Story, Epic, Bug, New Feature, and Improvement.
- A Task is just a general item of work that needs to be completed.
- A Story is used by teams to deal with requirements in users’ stories.
- An Epic is a large task that will typically have to be divided into smaller tasks.
- A Bug is a defect that needs fixing.
- A New Feature is a new feature of a product.
- An Improvement is simply an enhancement of a product.
You will not always see all of these options as some of them may be incompatible with your project’s workflow.
The third required field is Summary. Here, simply provide a summary of the issue.
The last required field is Description. In this field, you should flesh out your summary and describe the issue in more detail.
Once you have filled in the required fields, you have the option to fill in other fields, such as assigning your issue a Priority (we’ll elaborate more on this later) or creating another issue with the same Issue Type and Project.
Fill in any additional optional fields you want, and you are one step away from completing an issue!
Step 3: Simply Click Create!
The final step is to simply click Create. You will find this at the bottom right of your screen.
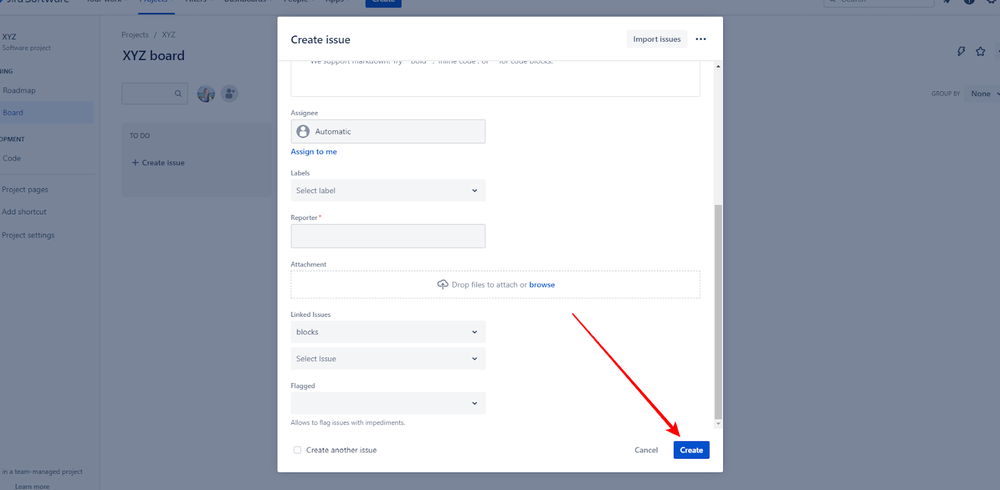
Now you have completed the process and successfully created an issue!
Creating Subtasks For Issues
Jira allows you to break your issue down into various subtasks. This is incredibly useful, as it allows you to split big tasks into smaller, more manageable ones. It also allows you to break an issue into different components that different teams need to complete.
Creating and tracking subtasks also allows you to observe any sub-issues that may be holding up the completion of the main issue. If there are one or two sub-issues that take a lot longer than all others, you can convert these sub-issues into their own issues.
Alternatively, if you find out that an issue is actually a sub-task of a bigger issue, you can convert that issue into a sub-issue of the bigger issue.
How To Create A Subtask
If you want to create a subtask, the first step is to select the issue you want to be the main issue. This is called the parent issue.
In this issue summary, click on the “Add a child issue” button.
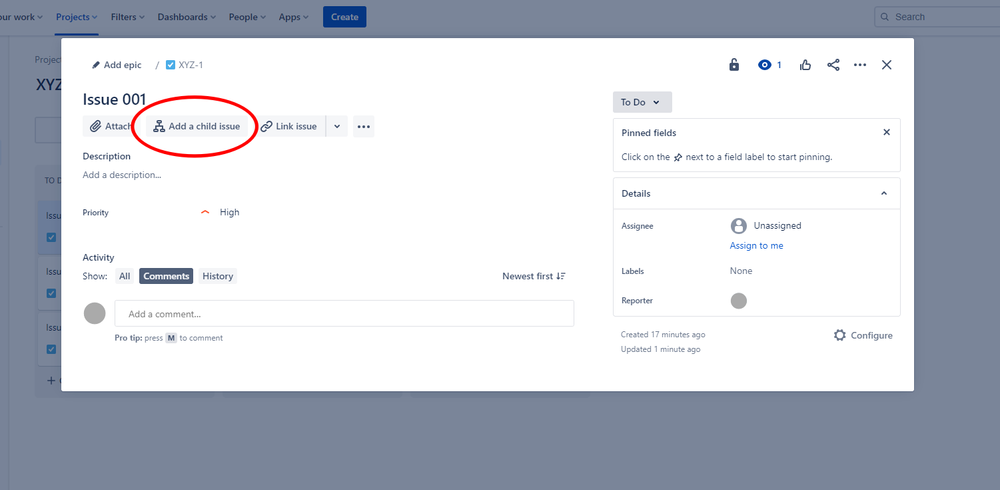
Once you have clicked on this button, you will have the option to fill in the issue summary.
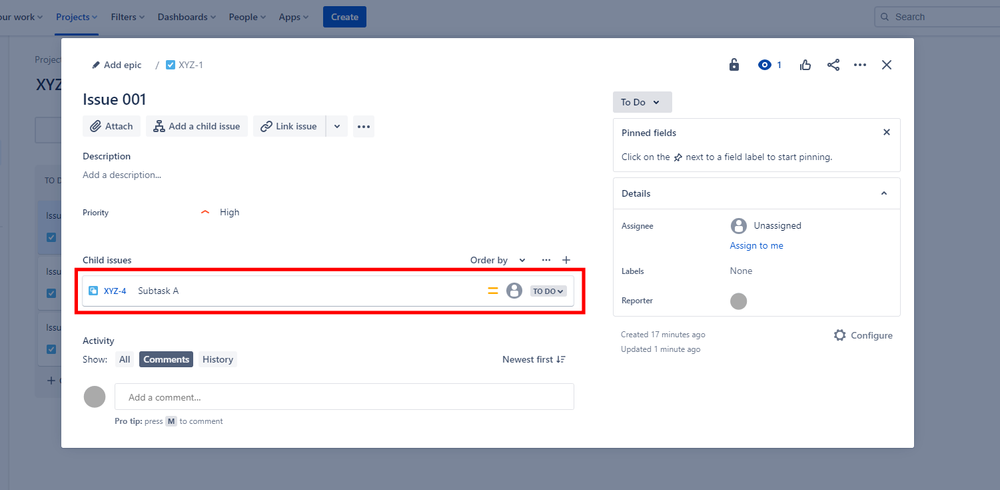
Once you have filled in the summary, simply click on the Create button and your sub-issue will be created.
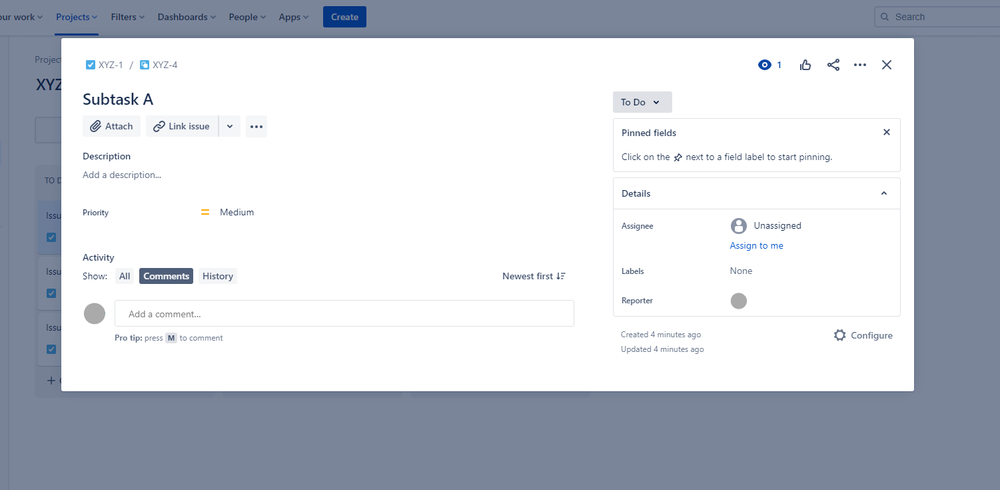
You can further edit the subtask by clicking on it. Here you can change its priority, add comments, edit its description, and more.
Ranking Issues According To Priority
Jira gives you the option to rank issues in terms of their priority. This feature is incredibly useful, as it signals to teams which issues are the most important and require urgent attention. It shows teams what issues they should choose to work on next and ensures that important matters don’t fall between the cracks.
To rank your issues, go to either your backlog or your board where you can see all your issues.
Ranking them is pretty simple - just click on the issue you want to move and drag it to where it falls on the list in terms of priority. For example, click on the most important issue and drag it to the top of the list.
Final Thoughts
When used correctly, Jira is a powerful platform that streamlines your work and enhances collaboration.
Understanding how to create and track Issues in Jira is essential to navigating the platform. Luckily, when you know what to do, creating Issues is relatively straightforward. Just follow these simple steps, and you should have no issues creating issues!
Improve your team with fun sprint retrospectives
Create unlimited boards for free and make retrospectives fun again