How To Create A Project In Jira

Knowing how to create a project in Jira is essential for improving the way you manage teams and developments. Any kind of development you work on in the software should be broken down into a project to make organization, planning, and collaboration a lot easier.
In this guide, we’ll cover everything you need to know about Jira projects. This includes how to create a project in Jira, what types of projects you can create, and how to share project configurations.
What Is A Project In Jira?
A project is when you put together a group of tasks, or issues, in Jira. Instead of just having a long and unorganized list of tasks in Jira, projects help teams prioritize work and stay organized.
A project in Jira is typically used to coordinate a product or service development.
There are different types of projects that you can create and manage to help your development work stay on track more easily. Projects can be customized to match the specific needs of your team.
Types Of Projects You Can Create In Jira
The type of project that you choose should depend on what kind of approach your team takes to develop, and what kind of project you will be working on.
When you create a project in Jira, you can choose between these six options:
- Basic software development
- Scrum software development
- Kanban software development
- Task management
- Process management
- Project management
Each of these types of projects comes with its own specific set of features.
Step-by-step Guide On How To Create A Project In Jira
Knowing how to create a project in Jira will help you manage your software developments more efficiently. Follow these steps to create your first project.
Step 1: Create The Project
Start by setting the project up. You will need to be a Jira administrator with global permission to do this. It’s important to understand Jira Permissions before you start.
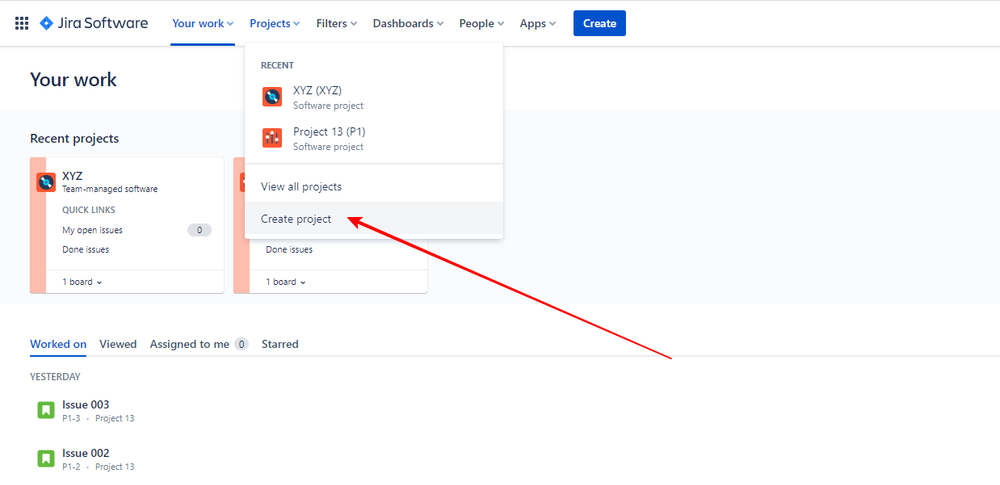
To create the project, simply:
- Select Projects in the navigation
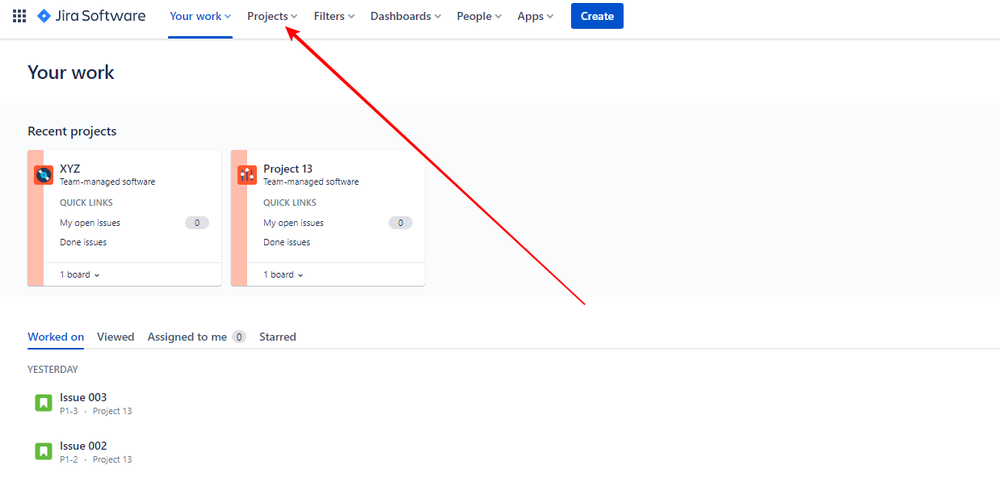
- Select Create Project
Step 2: Select The Product Or Category Template
Now you need to choose a template for your project. This is the type of project that you will create, as outlined earlier. To do this, you can choose between category templates and product templates.
Category templates are grouped together based on use-case categories. Product templates are grouped together by Jira cloud products under Products.
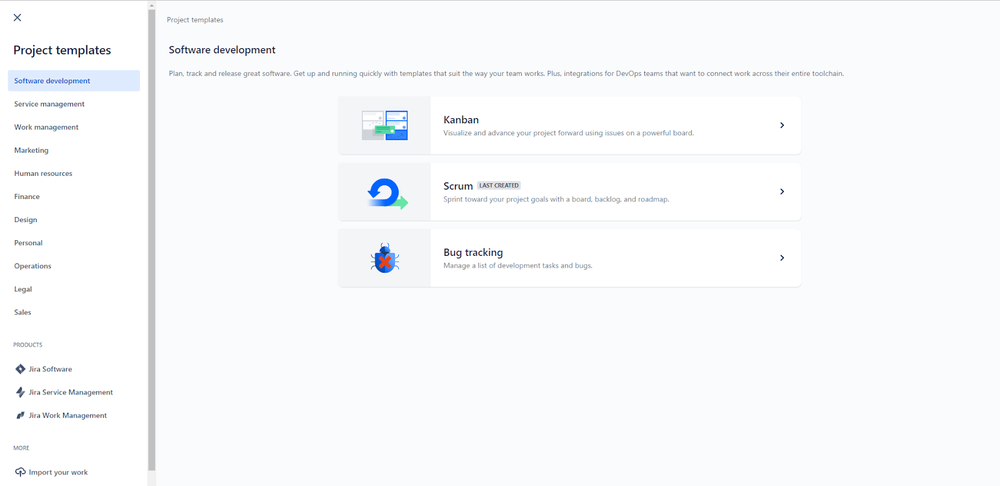
When you view each template, it will display detailed information about how the specific template works.
You can go through the different available templates for your project and choose the one that best matches your needs. To do this, click on one of them and simply select Use Template.

When creating a project in Jira based on a template, the project is created with a set of predetermined schemes.
These schemes are:
- A notification scheme (default)
- A permission scheme (default)
- A field configuration scheme (default)
- A workflow scheme
- A scheme for issue security
- A scheme for issue type
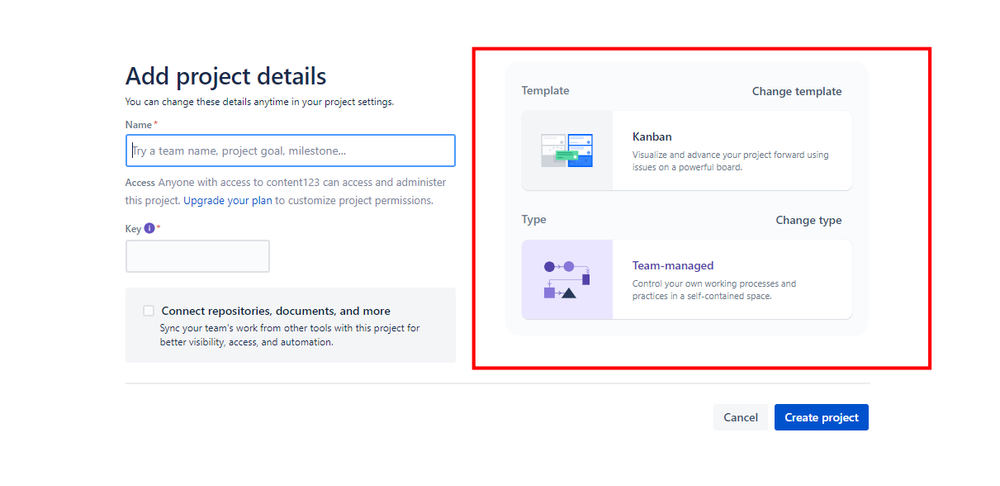
Step 3: Choose The Project Type
Next, you will need to choose what type of project you will create in Jira. This can either be a company-managed project, or a team-managed project. The type you choose should depend on how you want the project to run and what you want collaboration to look like.
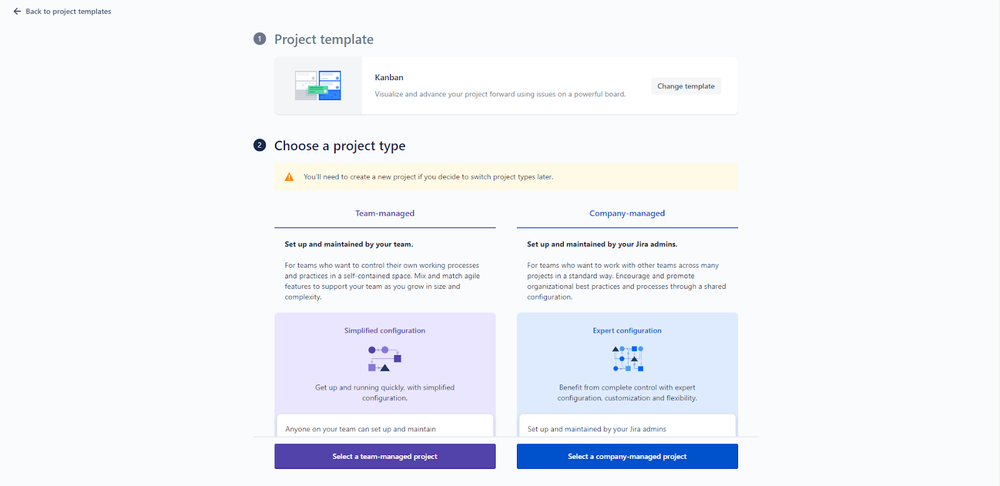
Any member of Jira can create a team-managed project, but only Jira admins can create company-managed projects using any template.
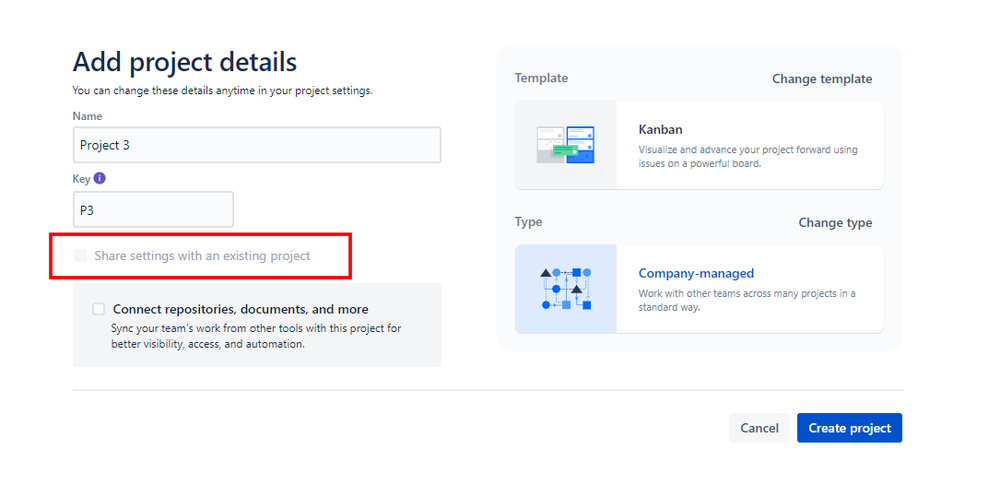
Step 4: Name The Project
Your Jira project will need a name, so now is the time to add this.
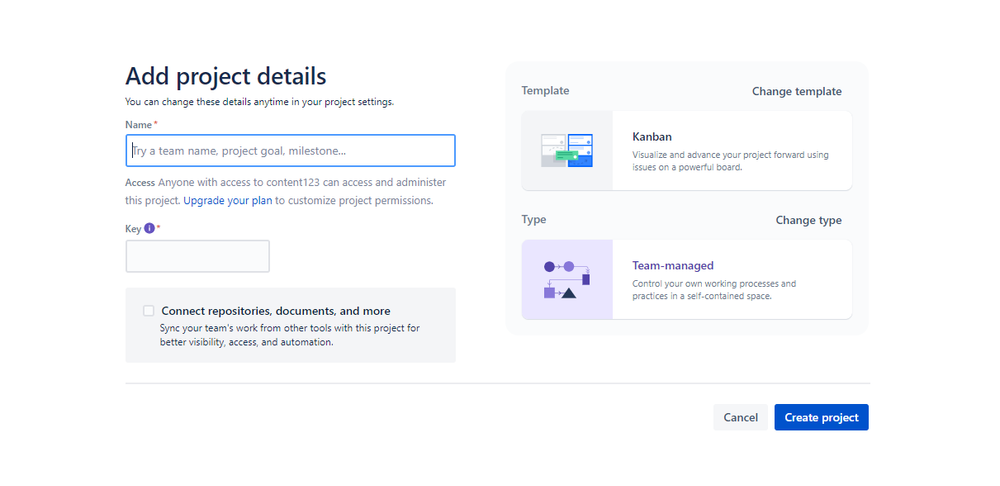
If you want to change the service project template at this stage, you can do so. Simply select Change Template and find a template that better matches your project.
You can also change the type of project that you selected in the previous step.
Step 5: Make The Project Live
Now your project in Jira is ready to go. Select Create to get the project into action.

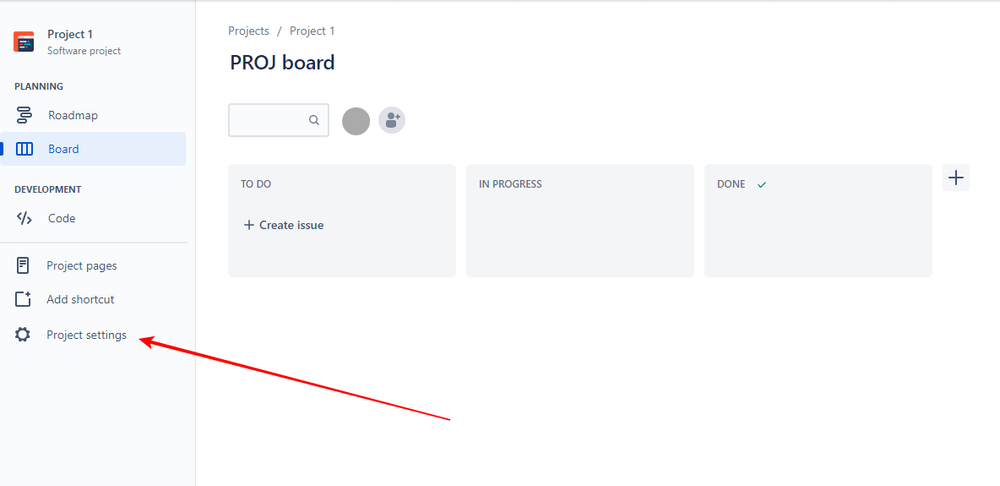
Jira will automatically generate a project key at this stage. The person that created the project is automatically set as the project lead.
You can change the project lead and project key by navigating to Project Settings in the sidebar.
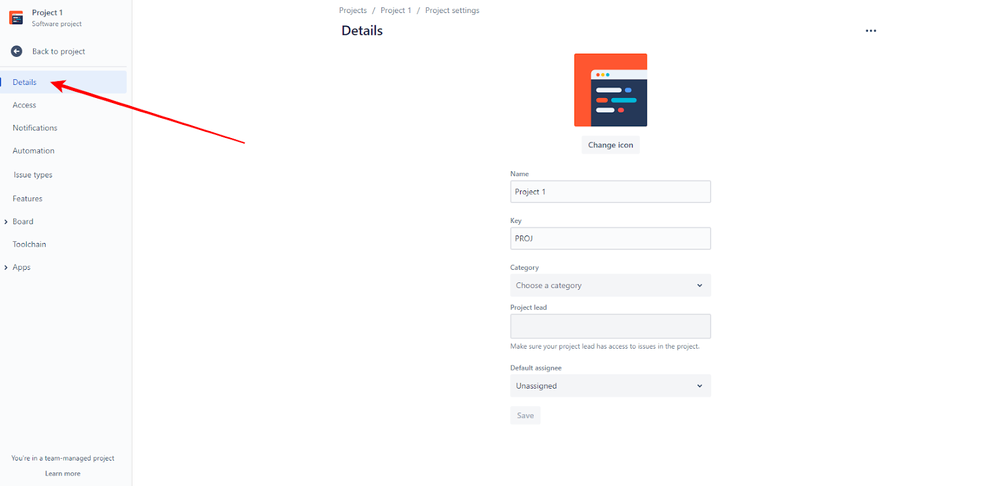
Then select Details. Here you can:
- change the project name and key
- choose a category for the project
- select the project lead
- and assign it to the relevant team member
Creating Shared Configuration Projects
When learning how to create a project in Jira, it’s important to understand that you can create different projects with a shared configuration. This is only possible for Jira admins to do.
If a project in Jira shares configurations, then it shares the following with another project:
- Workflows
- Permissions
- Issue types
- Fields
- Notifications
- Screens
If you change one of these elements within one project, then any other projects with the same configuration will adjust to the same change.
To create a project with shared configurations, follow all of the steps above up to step 4. Make sure that you choose a company-managed project.
Then, before creating and finalizing the project, do the following:
- After naming the project, select the Share settings with an existing project tickbox
- Click on the Choose Project dropdown menu and select the project that you want this new project to share configurations with
- Now you can select Create and the new configured project will be set up
Note that this feature is not available on the free version of Jira.
Conclusion
Knowing how to create a project in Jira is simple, although there is a lot that can go into each project. It’s important that you understand the different project types and templates available to make sure that your project is perfectly configured for the specific development you’re working on.
Once you understand how to create a project in Jira, it will help your team to stay a lot more organized and manage work more efficiently.
Improve your team with fun sprint retrospectives
Create unlimited boards for free and make retrospectives fun again