How To Create A Sprint In Jira

Knowing how to create a sprint in Jira is one of the most important functions of using this software. Sprints keep backlogs organized, they help teams understand exactly what work they need to do each day, and they’re a key element for keeping projects on track.
Without sprints, any product backlog will just be a long jumbled mess. Not organizing your backlog into sprints can result in a lot of confusion or wasted work on unnecessary tasks.
Follow this guide to learn exactly how to create a sprint in Jira step-by-step.
What Is A Sprint?
A sprint is a predetermined period of time that a team uses to complete a project from their product backlog. To create a sprint, a team first sets a fixed time period. Then, they complete and implement a functioning list of product tasks within that time period.
As the term suggests, a sprint is not a particularly long period. Instead, it is a period that is usually between one to four weeks long.
You also don’t use a sprint to cover all of your issues that need work. Instead, you choose a select few issues that have the greatest importance and use the sprint period to tackle them. The team commits to all of these issues at the start of the sprint.
Knowing how to create a sprint in Jira is important for streamlining the way work is managed. By using sprints and diving the work up amongst a team, collaboration improves and projects are better able to stay on track.
How To Create A Sprint In Jira
Knowing how to create a sprint in Jira is essential if you use this software. Follow these steps to help you create your first sprint.
Step 1: Create The Sprint
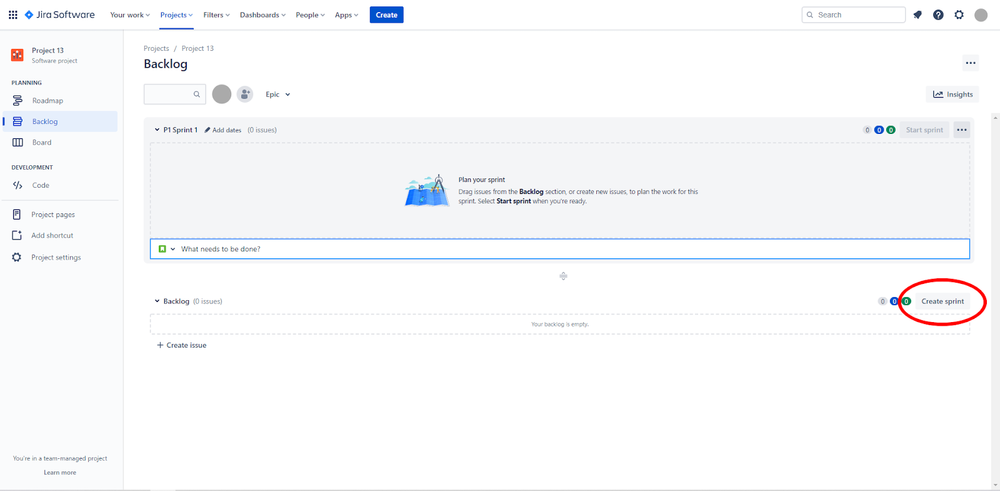
The first step is to create a new sprint. To do this, you will need to:
- Enter Jira and navigate to the top of your backlog in a scrum project.
- Select the Create Sprint button. This is found at the top of the backlog.
- Now your sprint is created and ready to be filled up.
You can create more than one sprint at a time. However, you can only work on one sprint at once. If you create multiple sprints, you will need to arrange them in the correct order for your backlog.
Step 2: Add Issues To Your Sprint
You have an empty sprint, so now you need to fill it up with issues from your backlog. To do this, you will need to take the following steps:
- Navigate to your backlog.
- Simply click and drag issues from the backlog and drop them into the sprint.
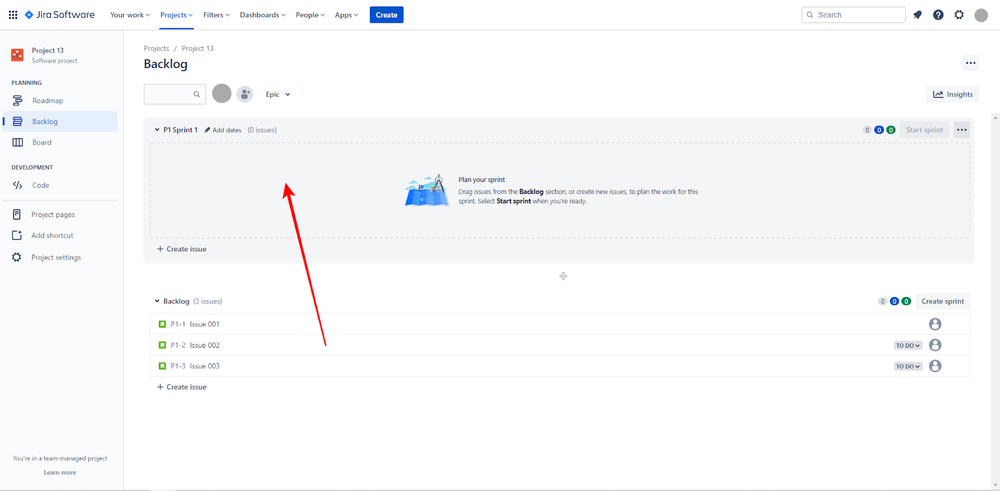
- Alternatively, select the issue in your backlog and edit it. You can update the Sprint field when doing this.
It’s essential that you figure out this step as a team. Don’t just randomly start dropping issues into the sprint. Sit down with the team and discuss what issues require the most work and commitment.
You also need to understand how much time each issue will take, and factor this into your sprint period.
Step 3: Start The Sprint
Your sprint is now set up and ready to go. The next step is to get your team working through the issues on the sprint.
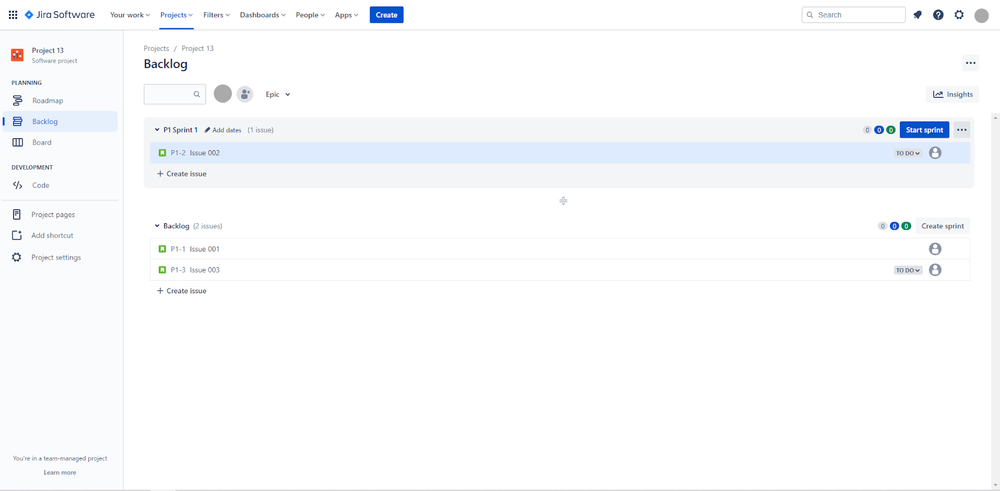
To do this, you will need to:
- Navigate to your scrum project’s backlog.
- Choose the sprint you’re ready to start and select Start Sprint.
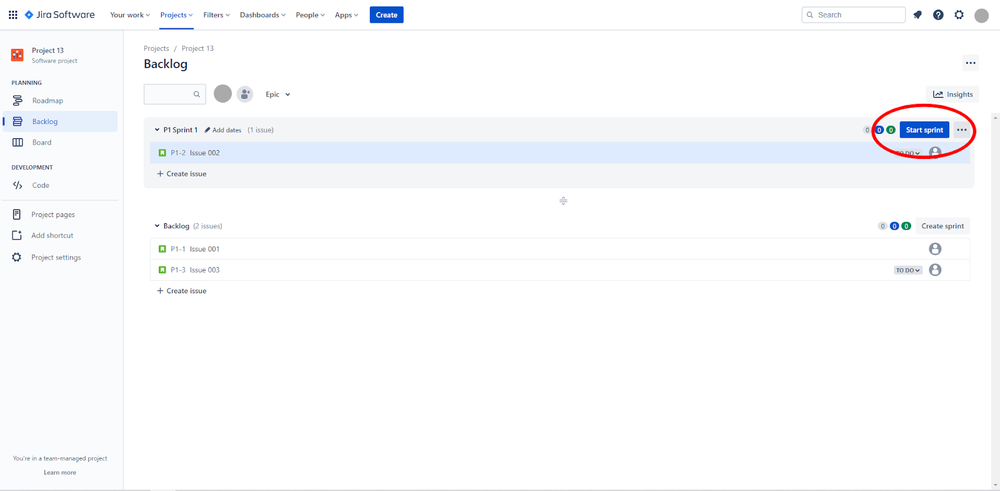
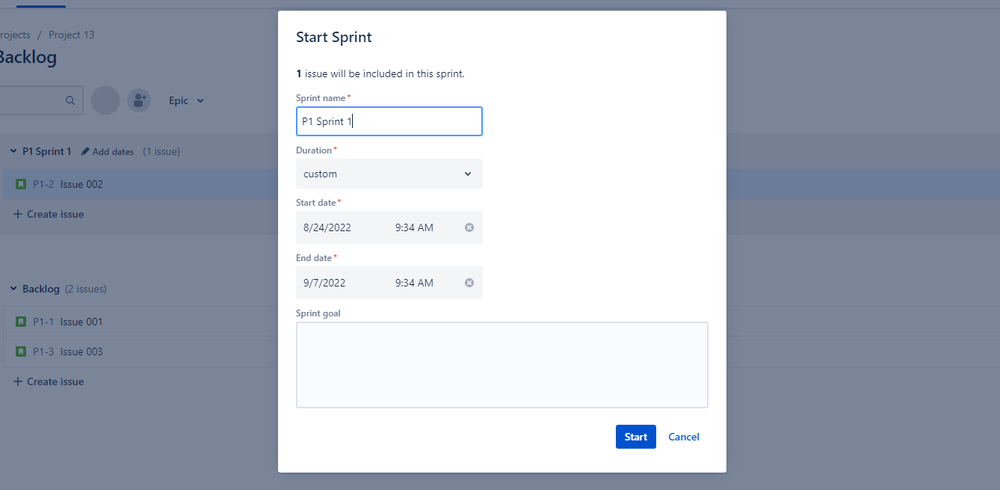
- Now you can:
- Select the start and end dates of the sprint
- Add the sprint name
- Add a sprint goal
In this step, it’s important to note that you can only start a new sprint once a previous sprint has already been finished. Otherwise, you will need to use the Parallel Sprint feature in Jira.
Your sprints that are ready to go will also be arranged in the right order in your backlog. You can only start sprints at the top of your backlog, so make sure to reorder the sprints correctly.
Step 4: Review Progress
An important part of running a sprint in Jira is monitoring your team’s progress throughout the sprint. You can access the important details that you need to follow in the Sprint Report.
If you have a strict timeline in place to complete your product backlog, then it’s important that sprints stay on track. This often requires a lot of collaboration within the team. So, try to have regular standup meetings where team members share updates on their progress and areas that they need help with.
Step 5: Close The Sprint
Once you reach the end of the sprint, the final step is to close it. To do this, you can:
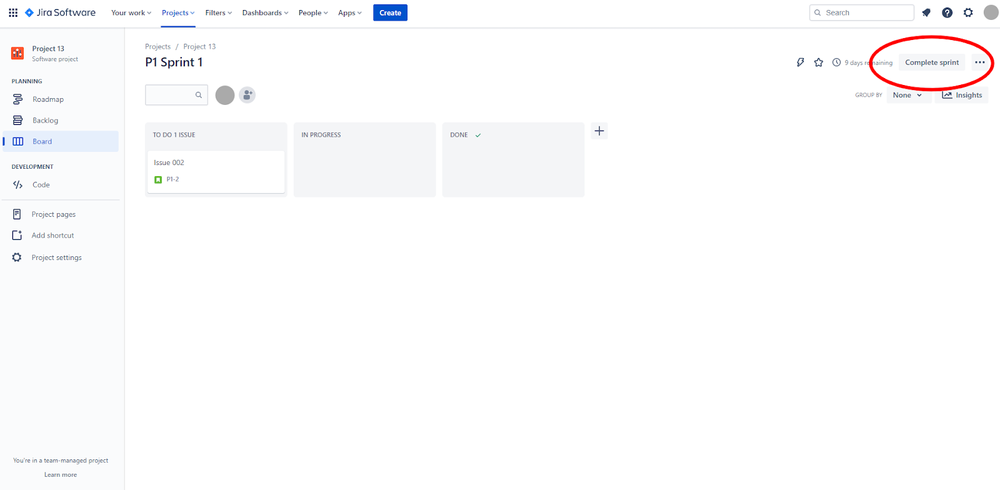
- Go to your scrum board and navigate to Active Sprints.
- Choose the correct sprint from the sprint drop-down menu.
- Select Complete Sprint. Now, all of the issues in the sprint that have been completed will move out of your active sprints.
- If there are any incomplete issues that still exist when you close the sprint, you will need to move them to either:
- The backlog of issues
- A new sprint
- A future sprint
It’s important that you have a clear definition of when work will be done for you to complete the sprint. Sprints are only effective if you have a clear definition of when work for your epic is done. Otherwise, sprints might drag on longer than they need to.
Conclusion
Knowing how to create a sprint in Jira is easy, and it’s one of the most important processes for effective project management.
Once you get the basics of creating sprints down, there are various ways you can optimize your sprints. One of these is to automate sprints and send weekly automated Slack messages to your team about all open issues within the sprint. In addition, when a sprint ends, you can ensure any outstanding issues get moved to the next sprint.
Sprints are all about teamwork and making your backlog of issues run more efficiently. The more you do sprints, the better you will get at understanding how many issues to add to each sprint and how long to dedicate to each sprint. By using sprints, managing scrum with Jira software will become a whole lot more efficient.
Improve your team with fun sprint retrospectives
Create unlimited boards for free and make retrospectives fun again