How To Delete An Issue In Jira
Digital platforms and collaboration tools like Jira have revolutionized the way we work, especially in the context of remote or hybrid work. Jira is one of the most popular online work platforms. If you are using it, you will know that the use of issues is central to Jira’s functionality.
But, perhaps you’ve created a duplicate issue or created an issue that you don’t need anymore and now you want to delete it and aren’t sure how.
Well, if you are considering deleting an issue, need help with how to delete an issue, or simply want to know more about deleting issues in Jira, you have come to the right place. Below, we have put together everything you need to know about the process and consequences of deleting an issue.
Step-by-step Instructions On How To Delete An Issue In Jira
Here are step-by-step instructions that you can follow to delete an issue in Jira.
Finding The Issue
The first step is to locate the issue that you want to delete. To do so, follow these steps:
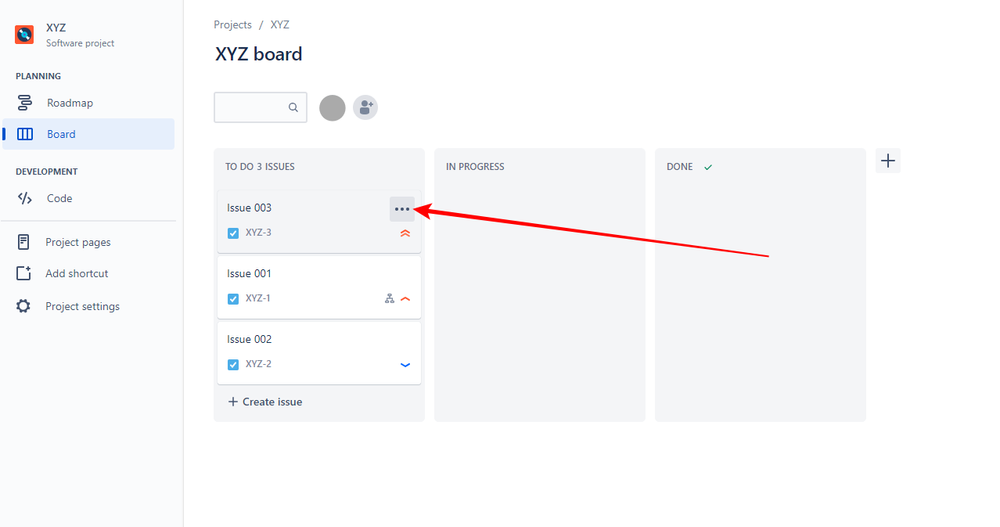
Step 1: Go into the project with the issue you want to delete. Here you will find a TO DO list with the issues for the project.
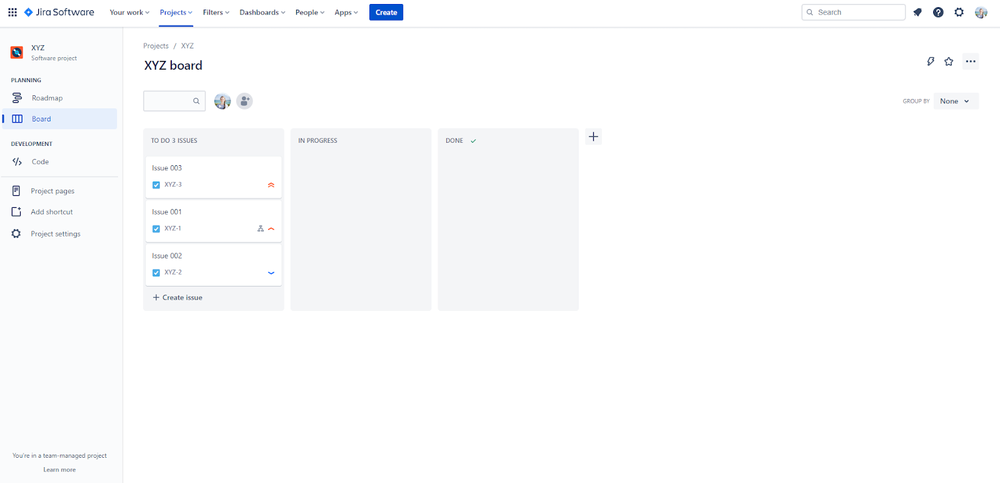
Step 2: You will either be able to see the issue you want to delete or you can search for it in the search bar above the issue list.
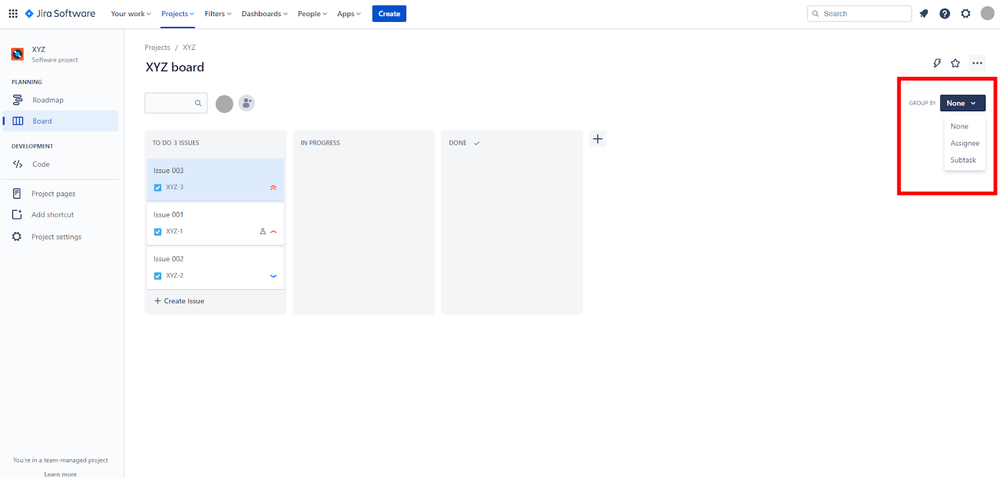
Alternatively, you can narrow down your search by using different pulldown menus to group your issues. You can narrow your search according to the status of the project or the individual or team the project was assigned to.
Each time you narrow your search according to one of these criteria, you will get an updated list of relevant Issues.
Regardless of what method you use to find the issue you want to delete, you should find the issue in the search results.
Deleting The Issue
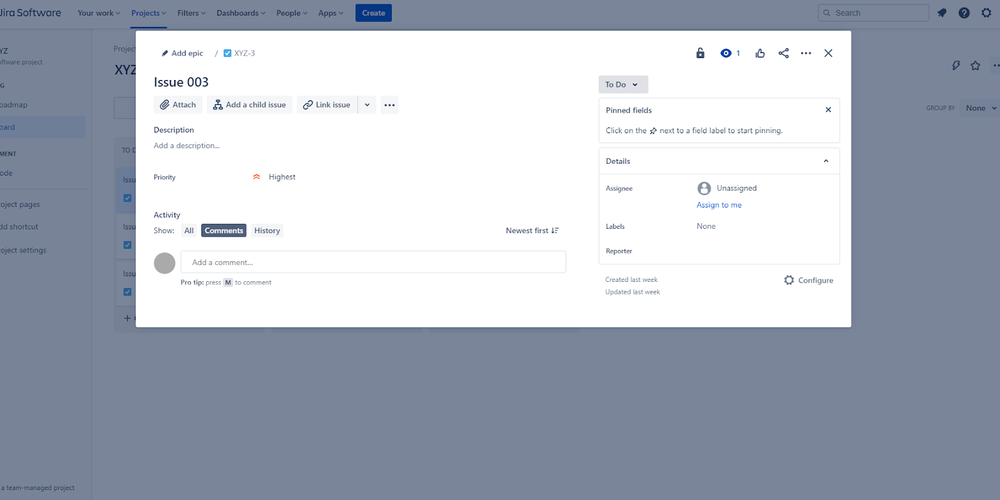
Step 3: Once you have found the issue you want to delete in the search results, click on it. This will open the issue and show you more details about it.
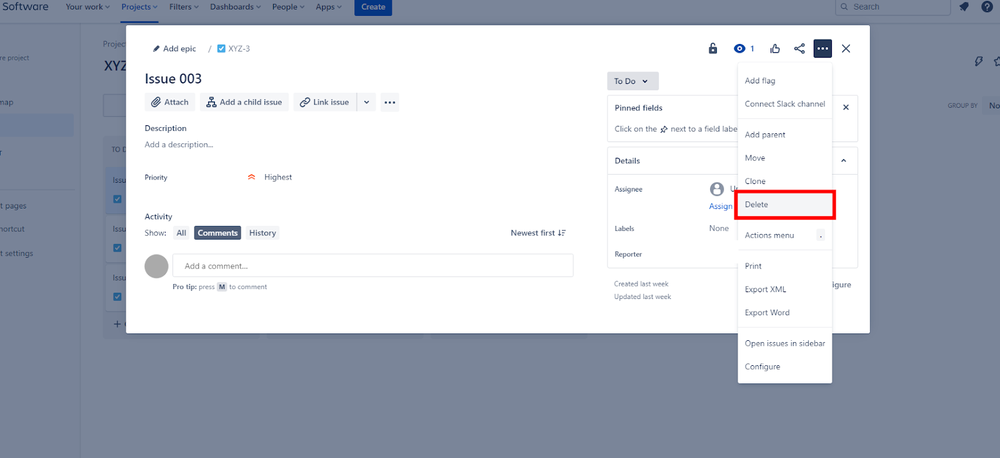
Step 4: In the top right corner of the issue, you should find the Actions button. It is represented by three dots in a horizontal line and is to the right of the Share button.
Click on the Actions button and you should see a drop-down menu that contains different actions. One of these is Delete.
Step 5: Click on the Delete option, and this will open a window asking for confirmation that you intend on deleting the issue from the server.
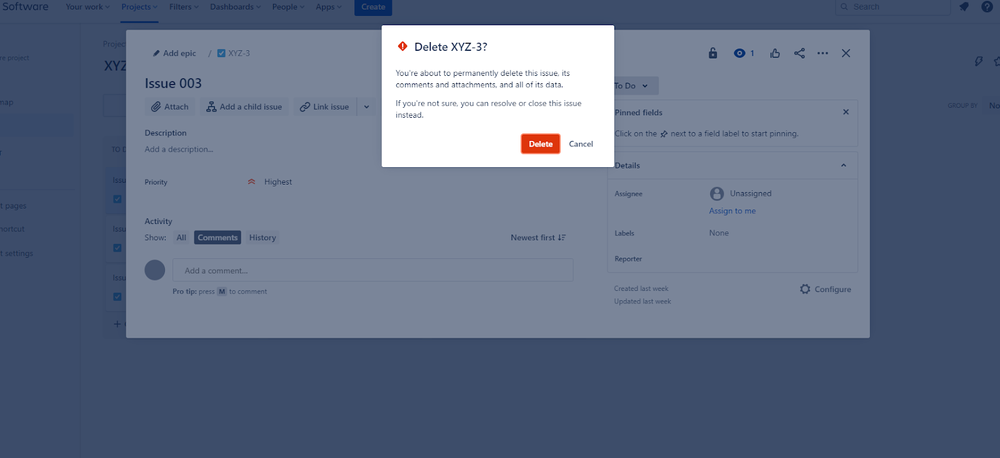
Step 6: Now, all you have to do is confirm that you are deleting the issue by clicking Delete in the new window and your issue is deleted!
Alternative Way To Delete Issues
If you’re looking for a quicker way to delete issues in Jira, you can delete issues straight from the TO DO list.
When you hover your mouse over an issue, a menu button (three dots) will appear.
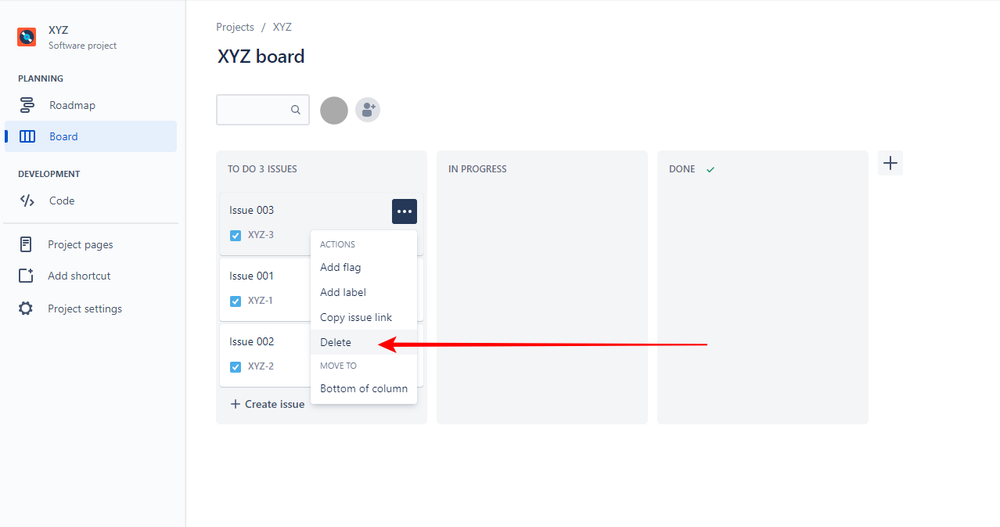
Click on this button on the issue you want to delete and it will give you a list of actions.
Click on Delete.
You’ll see the same pop-up mentioned above warning you that you are about to permanently delete the issue. Click Delete and that’s it!
Save Deleted Issues In Jira Cloud
When you delete something on your computer on your mobile phone, chances are you will be able to recover it. It is not immediately removed from your device and is usually stored (sometimes temporarily) in the trash or a recycle bin.
Unfortunately, when you delete an issue in Jira, you are not able to recover it. The default situation with Jira is that once an issue has been deleted, it is lost forever. Jira permanently removes the issue from the database and will leave no trace of it.
This can create big problems if you delete important issues by mistake, or you later discover that you need to access some part of a deleted issue. Luckily, there are add-ons you can use to save your deleted issues in Jira Cloud. For example, there’s an Issue History for Jira add-on from Saasjet and Rewind’s Rewind Backups for Jira Cloud.
Note that you have to download these add-ons before you delete an issue for it to be recoverable. If you have not yet downloaded and enabled an add-on that allows you to save your deleted issues to Jira Cloud, any deleted issues are gone for good.
Therefore, we cannot recommend downloading and enabling one straight away. Don’t wait until it is too late!
Why Can’t I Delete Issues In Jira?
You might try to delete an Issue in Jira, only to find that you are not given the option to do so. This is quite common.
If you cannot delete an issue on Jira, this usually means that you do not have the project authority required to do so. Note that even if you are a super admin, you still might not have the necessary authority.
To find out whether or not you have authority, check out the permissions settings of the project which will show you who has the authority to Delete Issues.
If you don’t have the authority to delete an issue but need to be able to do so, get in touch with the individual or admin who has authority to do so. Ask them to grant you permission to delete the issue or delete the issue on your behalf.
Final Thoughts
The process of deleting issues is pretty simple if you know what to do. If you want to delete an issue, simply follow the steps set out above and you shouldnt encounter any problems. Simply ensure that you have the authority to delete the issue, find it and then delete it.
Just remember that, unless you have an add-on that backs up your issues before you delete them, deleted issues are not recoverable. Therefore, it may be worth downloading and activating an add-on or being very careful with what issues you delete or who has the permission to delete issues.
Improve your team with fun sprint retrospectives
Create unlimited boards for free and make retrospectives fun again